Homework 7: Keyboard Instrument
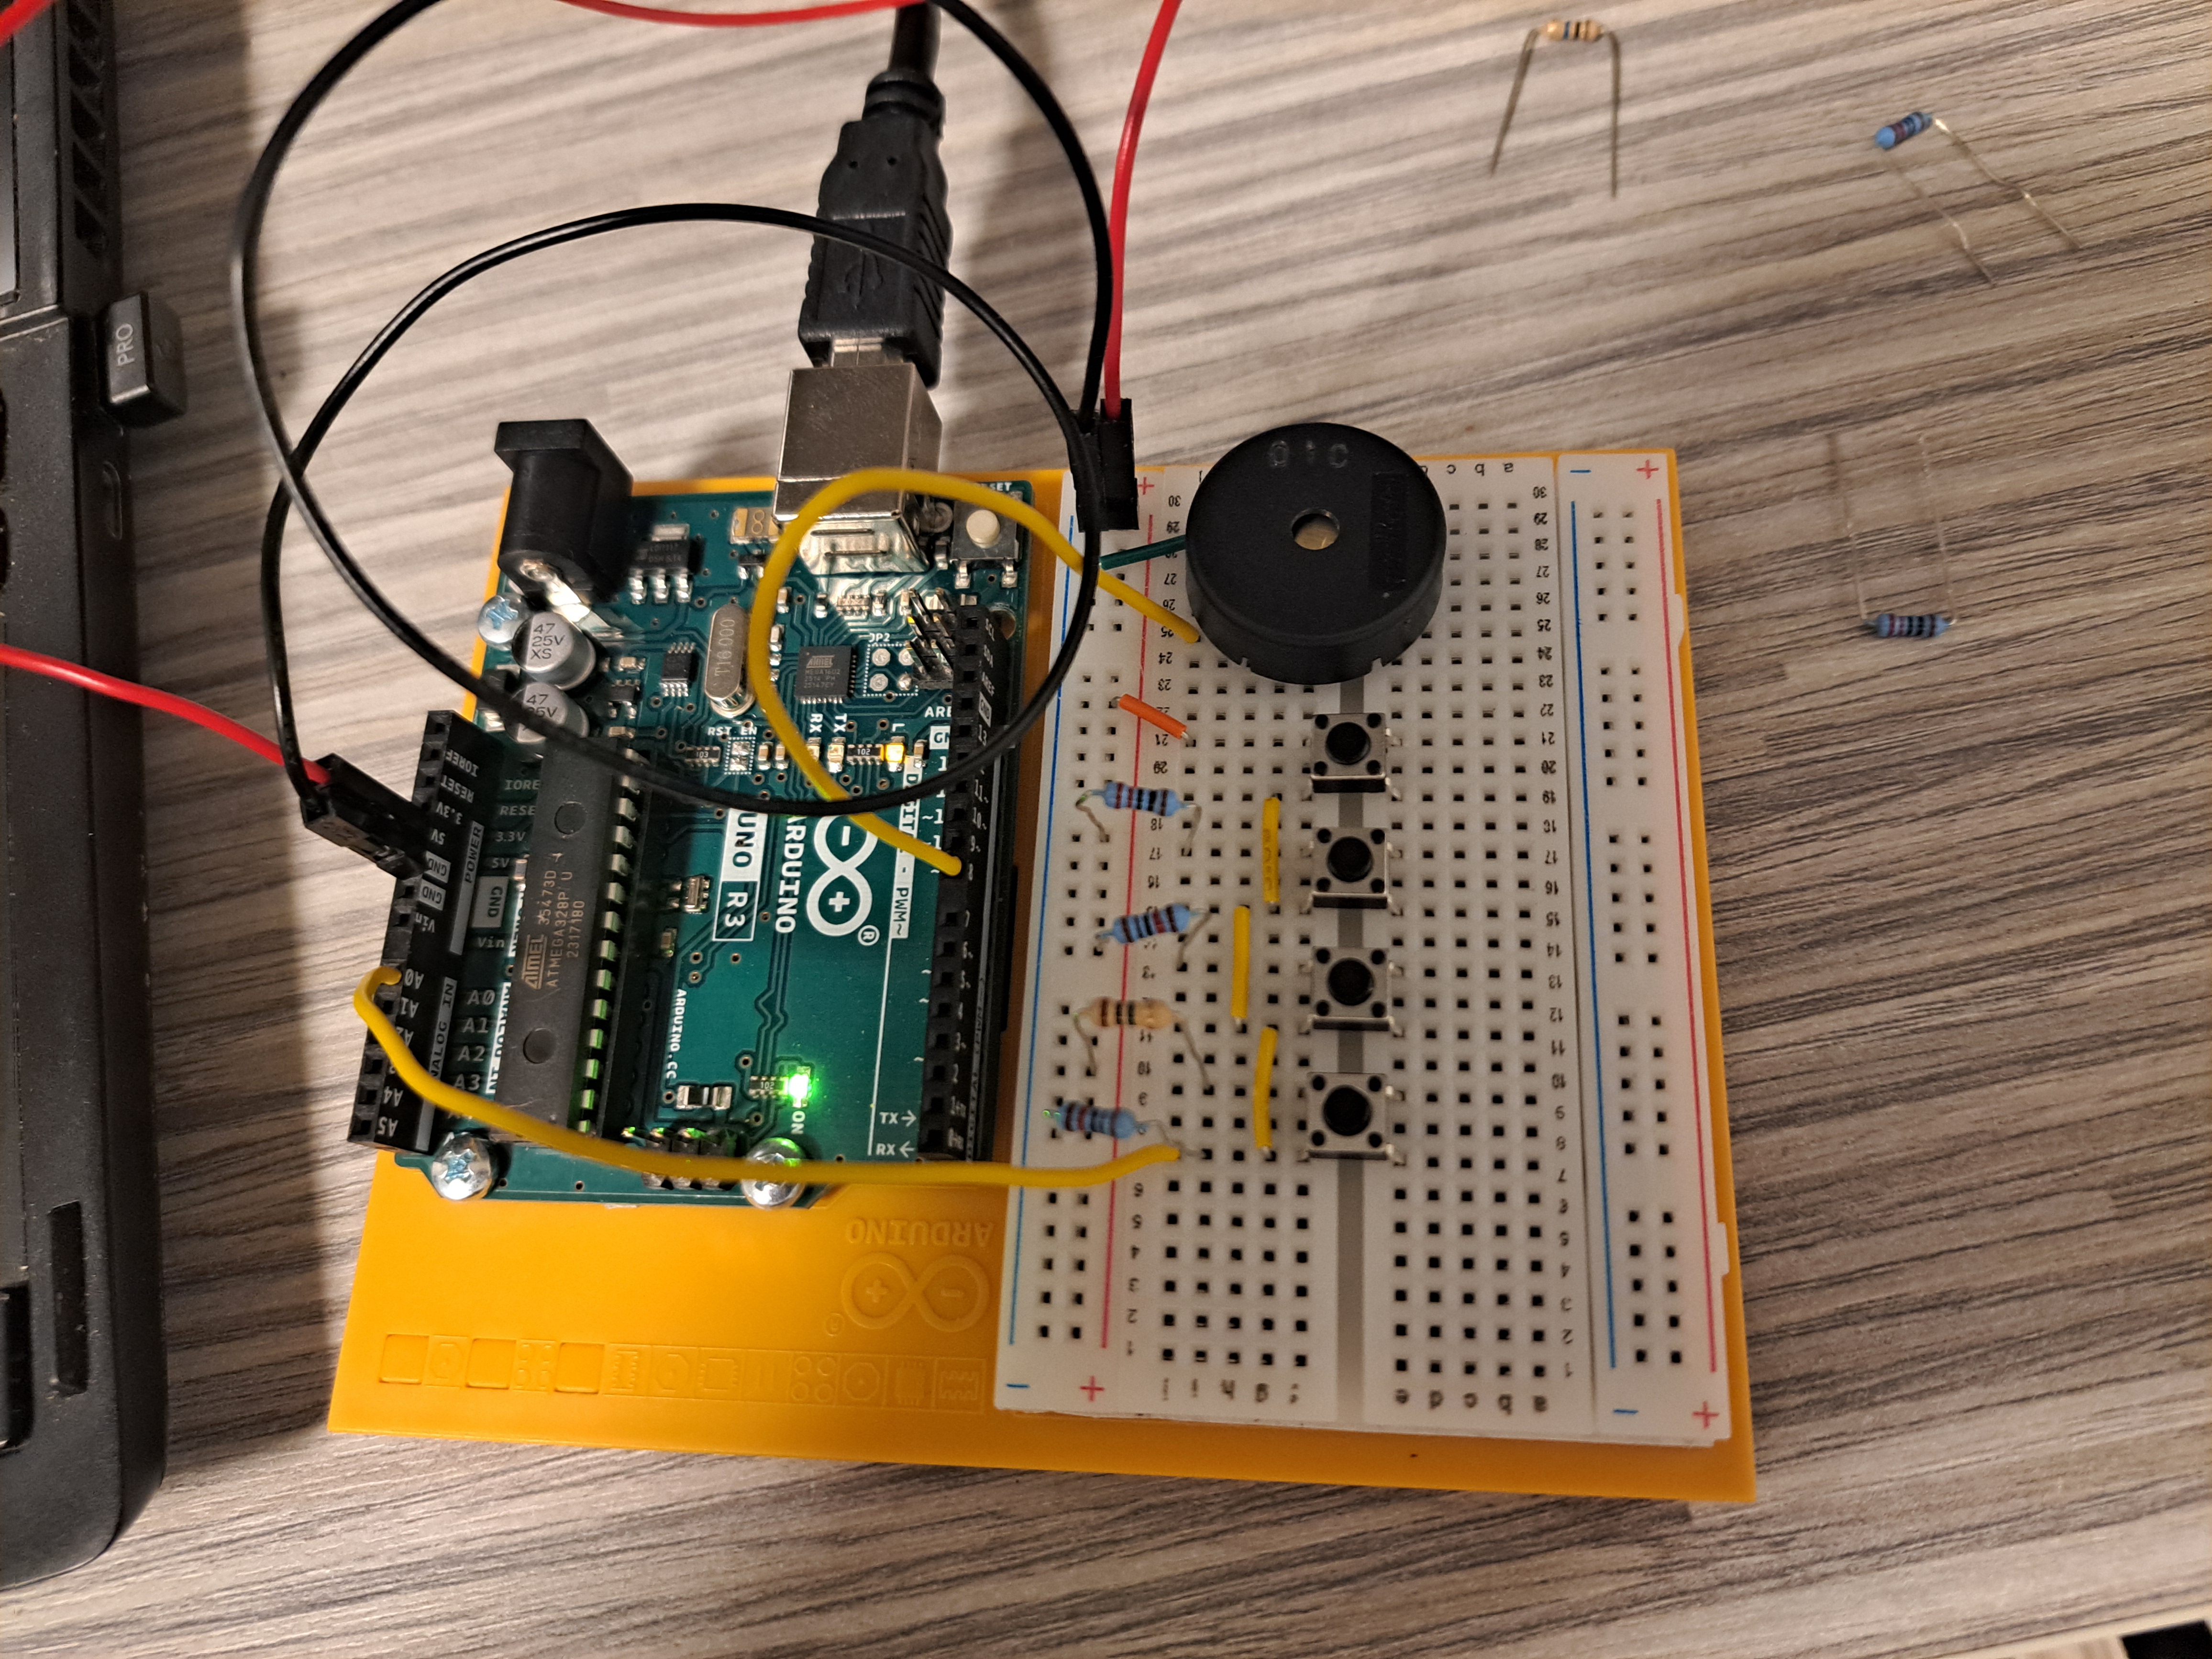
I enjoyed this project more than homework 6, since the final product was more pleasant to hear. It was also interesting to be introduced to the idea of using differences in voltage at different points in a circuit to use as analog data, since up until now, we just took output from the sensors and used it as the analog data.
The Circuit
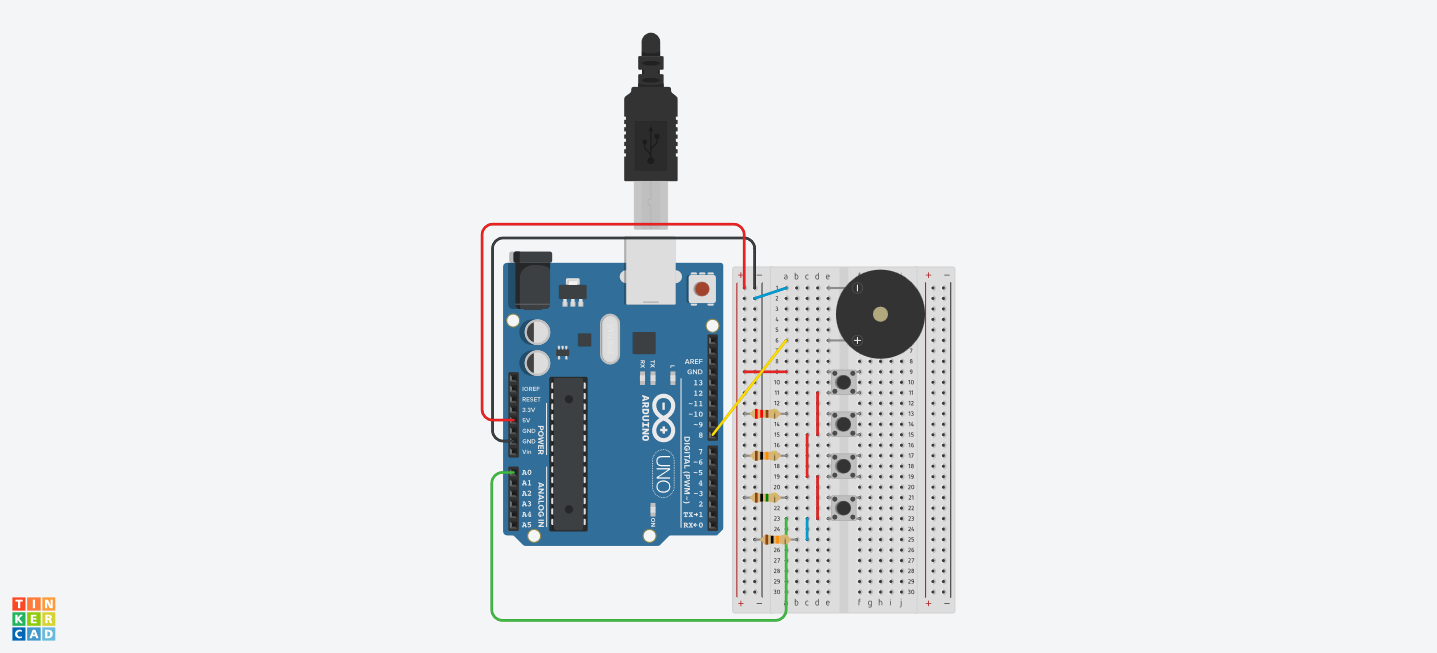
Parts List
| Name | Quantity | Component |
|---|---|---|
| U1 | 1 | Arduino Uno R3 |
| PIEZO1 | 1 | Piezo |
| S1, S2, S3, S4 | 4 | Pushbutton |
| R1 | 1 | 220 Ω Resistor |
| R2, R4 | 2 | 10 kΩ Resistor |
| R3 | 1 | 1 MΩ Resistor |
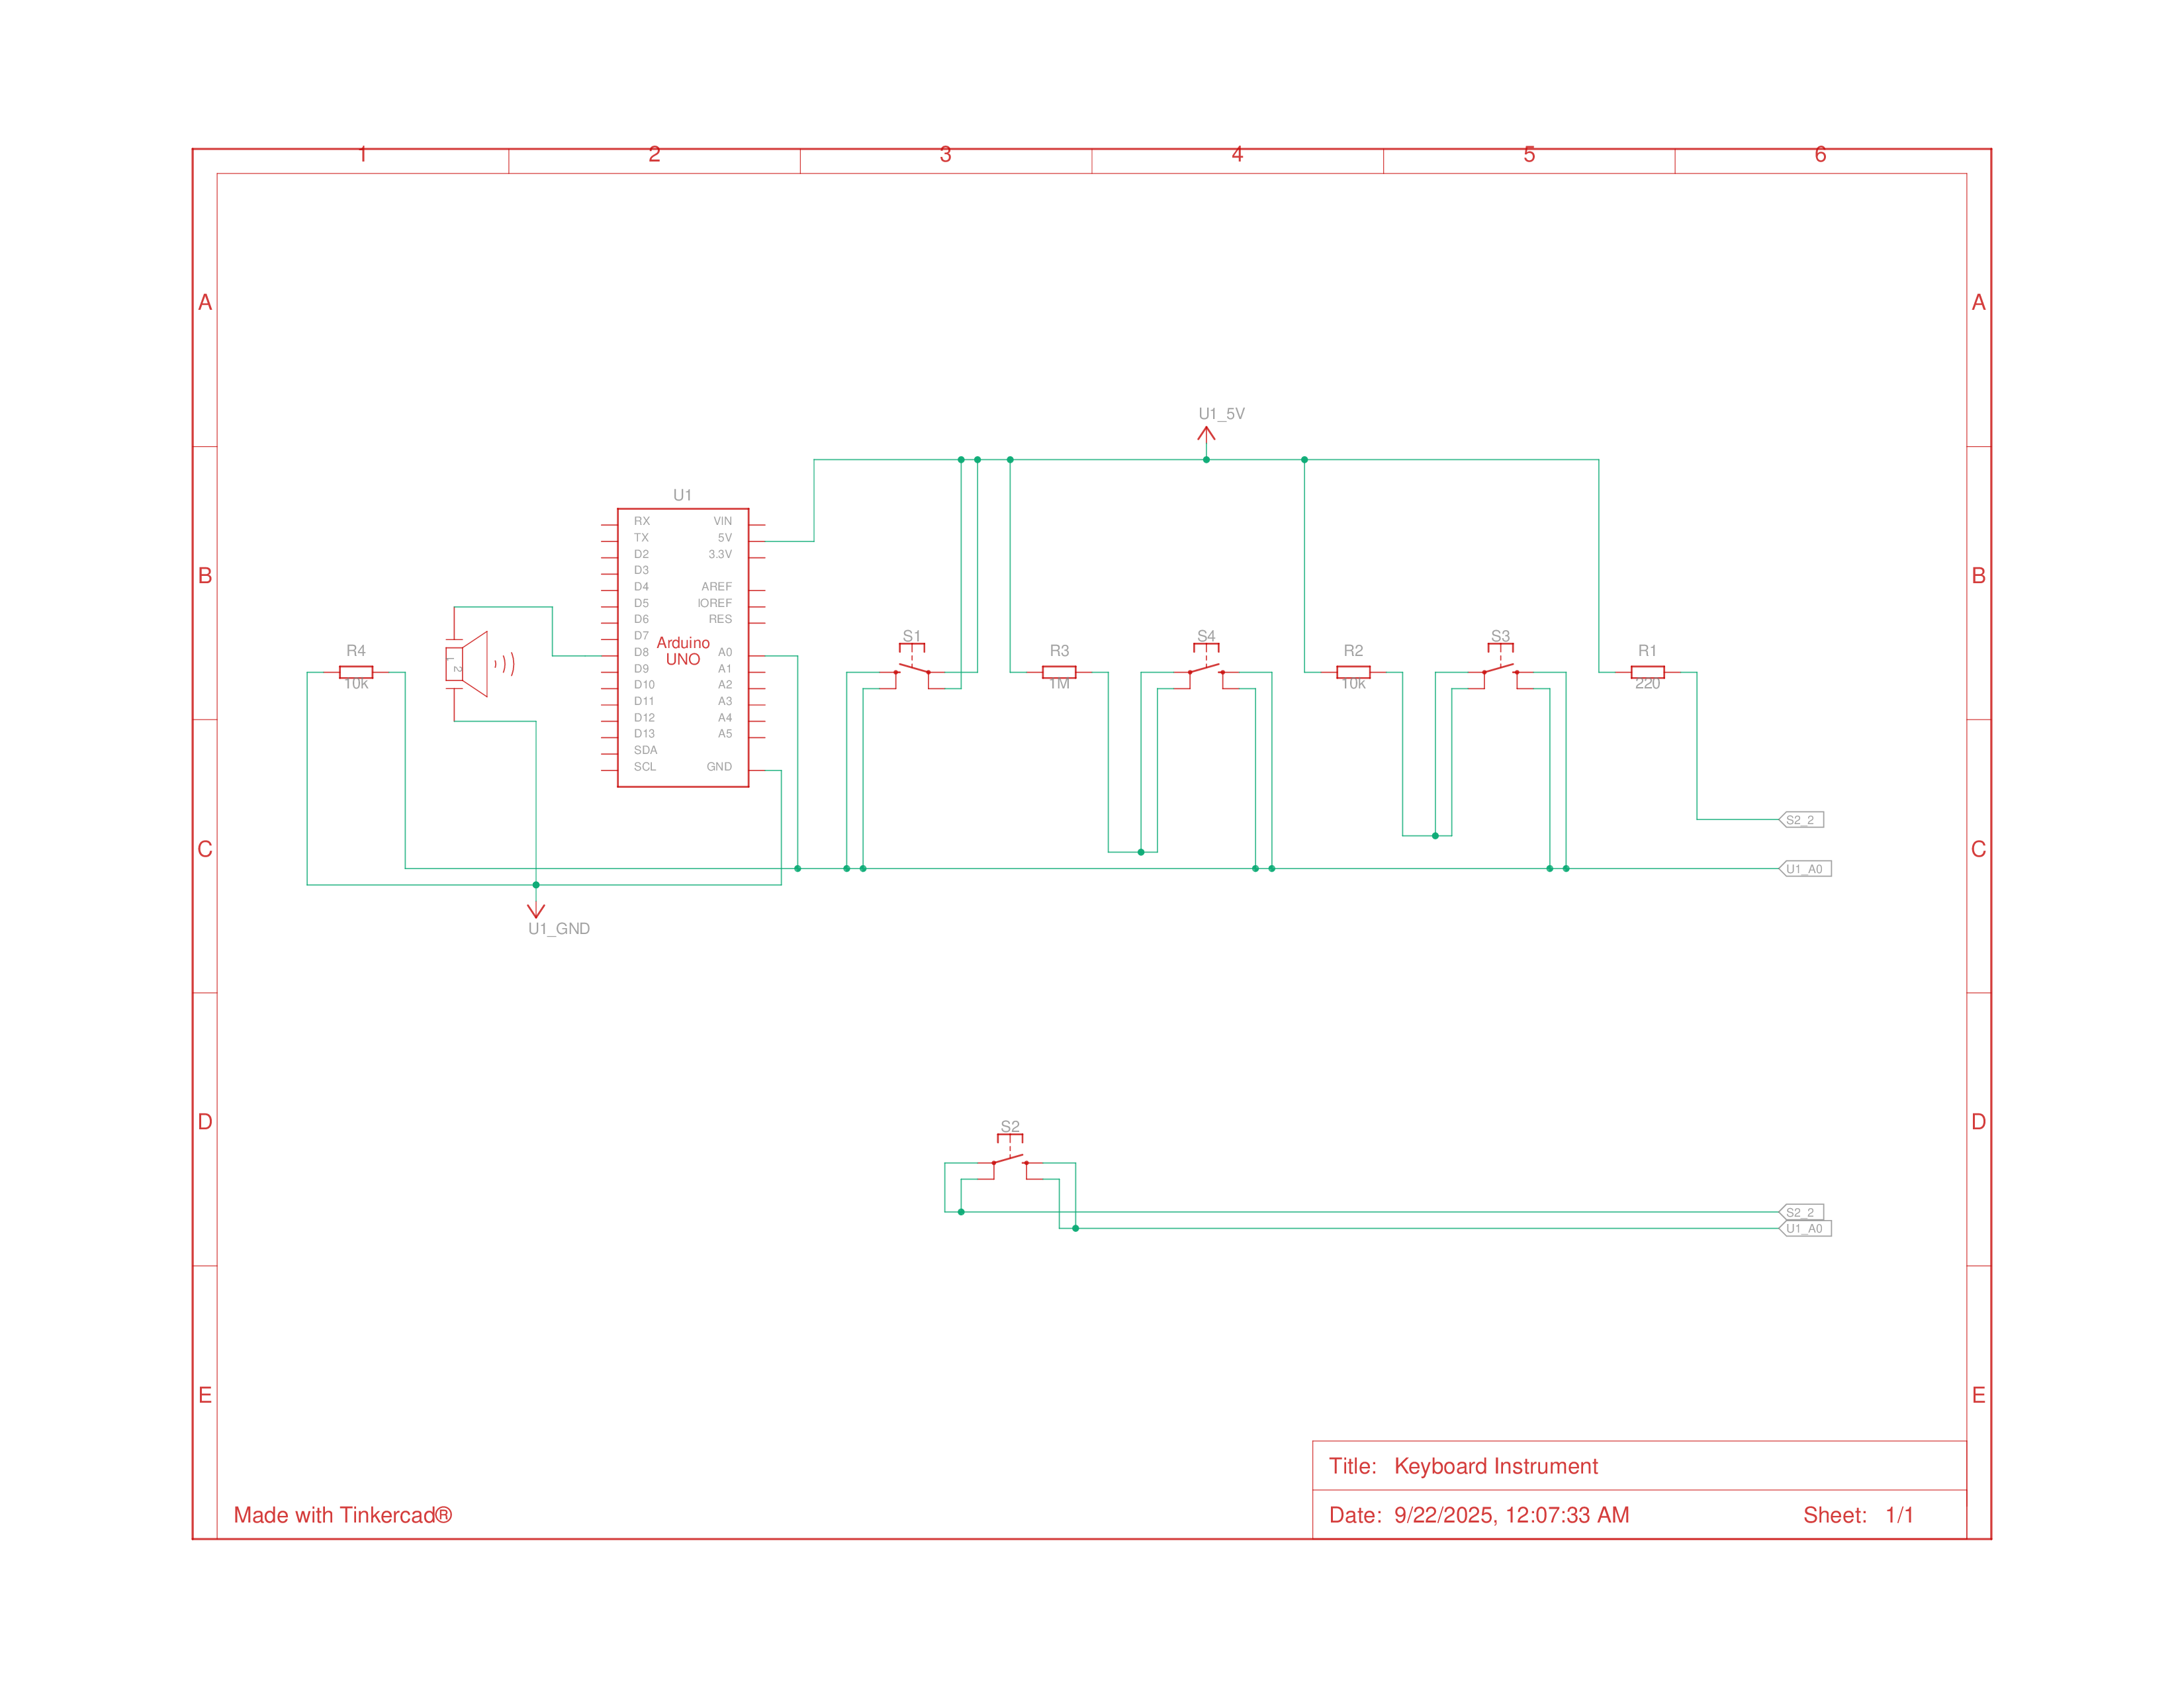
Schematics
Building the Circuit
Initially assembling the circuit was easy enough and straight forward since I have been getting used to picking out jumper cables and resistors, as well as bending them into shape. However, like homework 6, I also ran into the issue of weird electrical noise distorting the Piezo’s sound. This issue was even more annoying for this homework, since it was only the 4th switch that had the disturbance, and with further investigation ( just rewiring the components and switching them around), I was able to identify that it was being caused on any switch with the 1MΩ resistor. I also managed to somewhat mitigate the problem by twisting the wires and very specifically nudging the resistor, and was able to produce a somewhat clean sound, though I wasn’t able to completely get rid of the distortion.
Homework 7: Keyboard Instrument demo
Programming
After confirming that the circuit was mostly working, I then unloaded the example sketch and began programming the arduino. It was a super straightforward if statement, though, I did learn the frequencies of middle C, D, E, F, were 262, 294, 339, 349 respectively, which is new random trivia to know.
1
2
3
4
5
6
7
8
9
10
11
12
13
14
15
16
17
18
19
20
21
22
23
24
25
26
// create an array of notes
// (frequencies of middle C, D, E, F)
int notes[] = { 262, 294, 330, 349 };

void setup() {
  // start communication
  Serial.begin(9600);
}

void loop() {
  int keyVal = analogRead(A0);
  Serial.println(keyVal);

  // play the notes according to value
  if (keyVal == 1023) {
    tone(8, notes[0]);
  } else if (keyVal >= 990 && keyVal <= 1010) {
    tone(8, notes[1]);
  } else if (keyVal >= 505 && keyVal <= 515) {
    tone(8, notes[2]);
  } else if (keyVal >= 5 && keyVal <= 10) {
    tone(8, notes[3]);
  } else {
    noTone(8);
  }
}