Homework 13: Touchy-Feely Lamp
The Circuit
Parts List
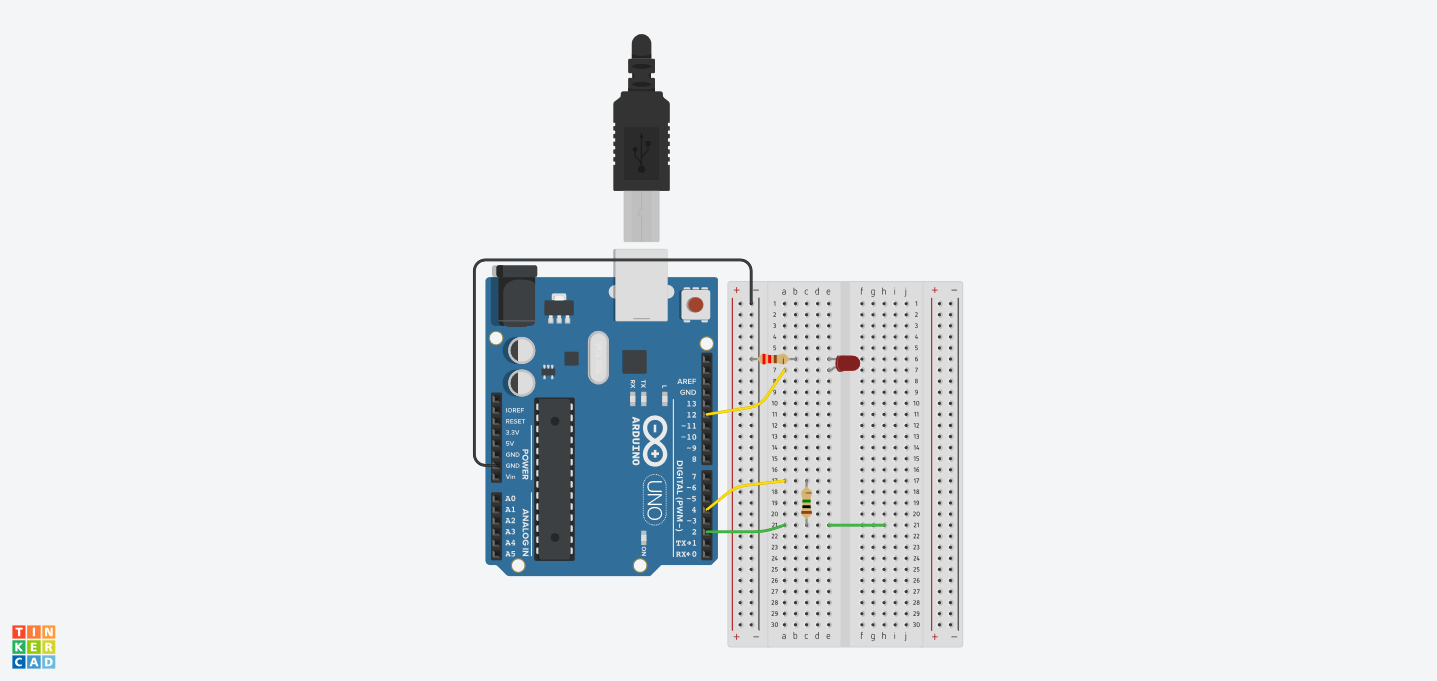
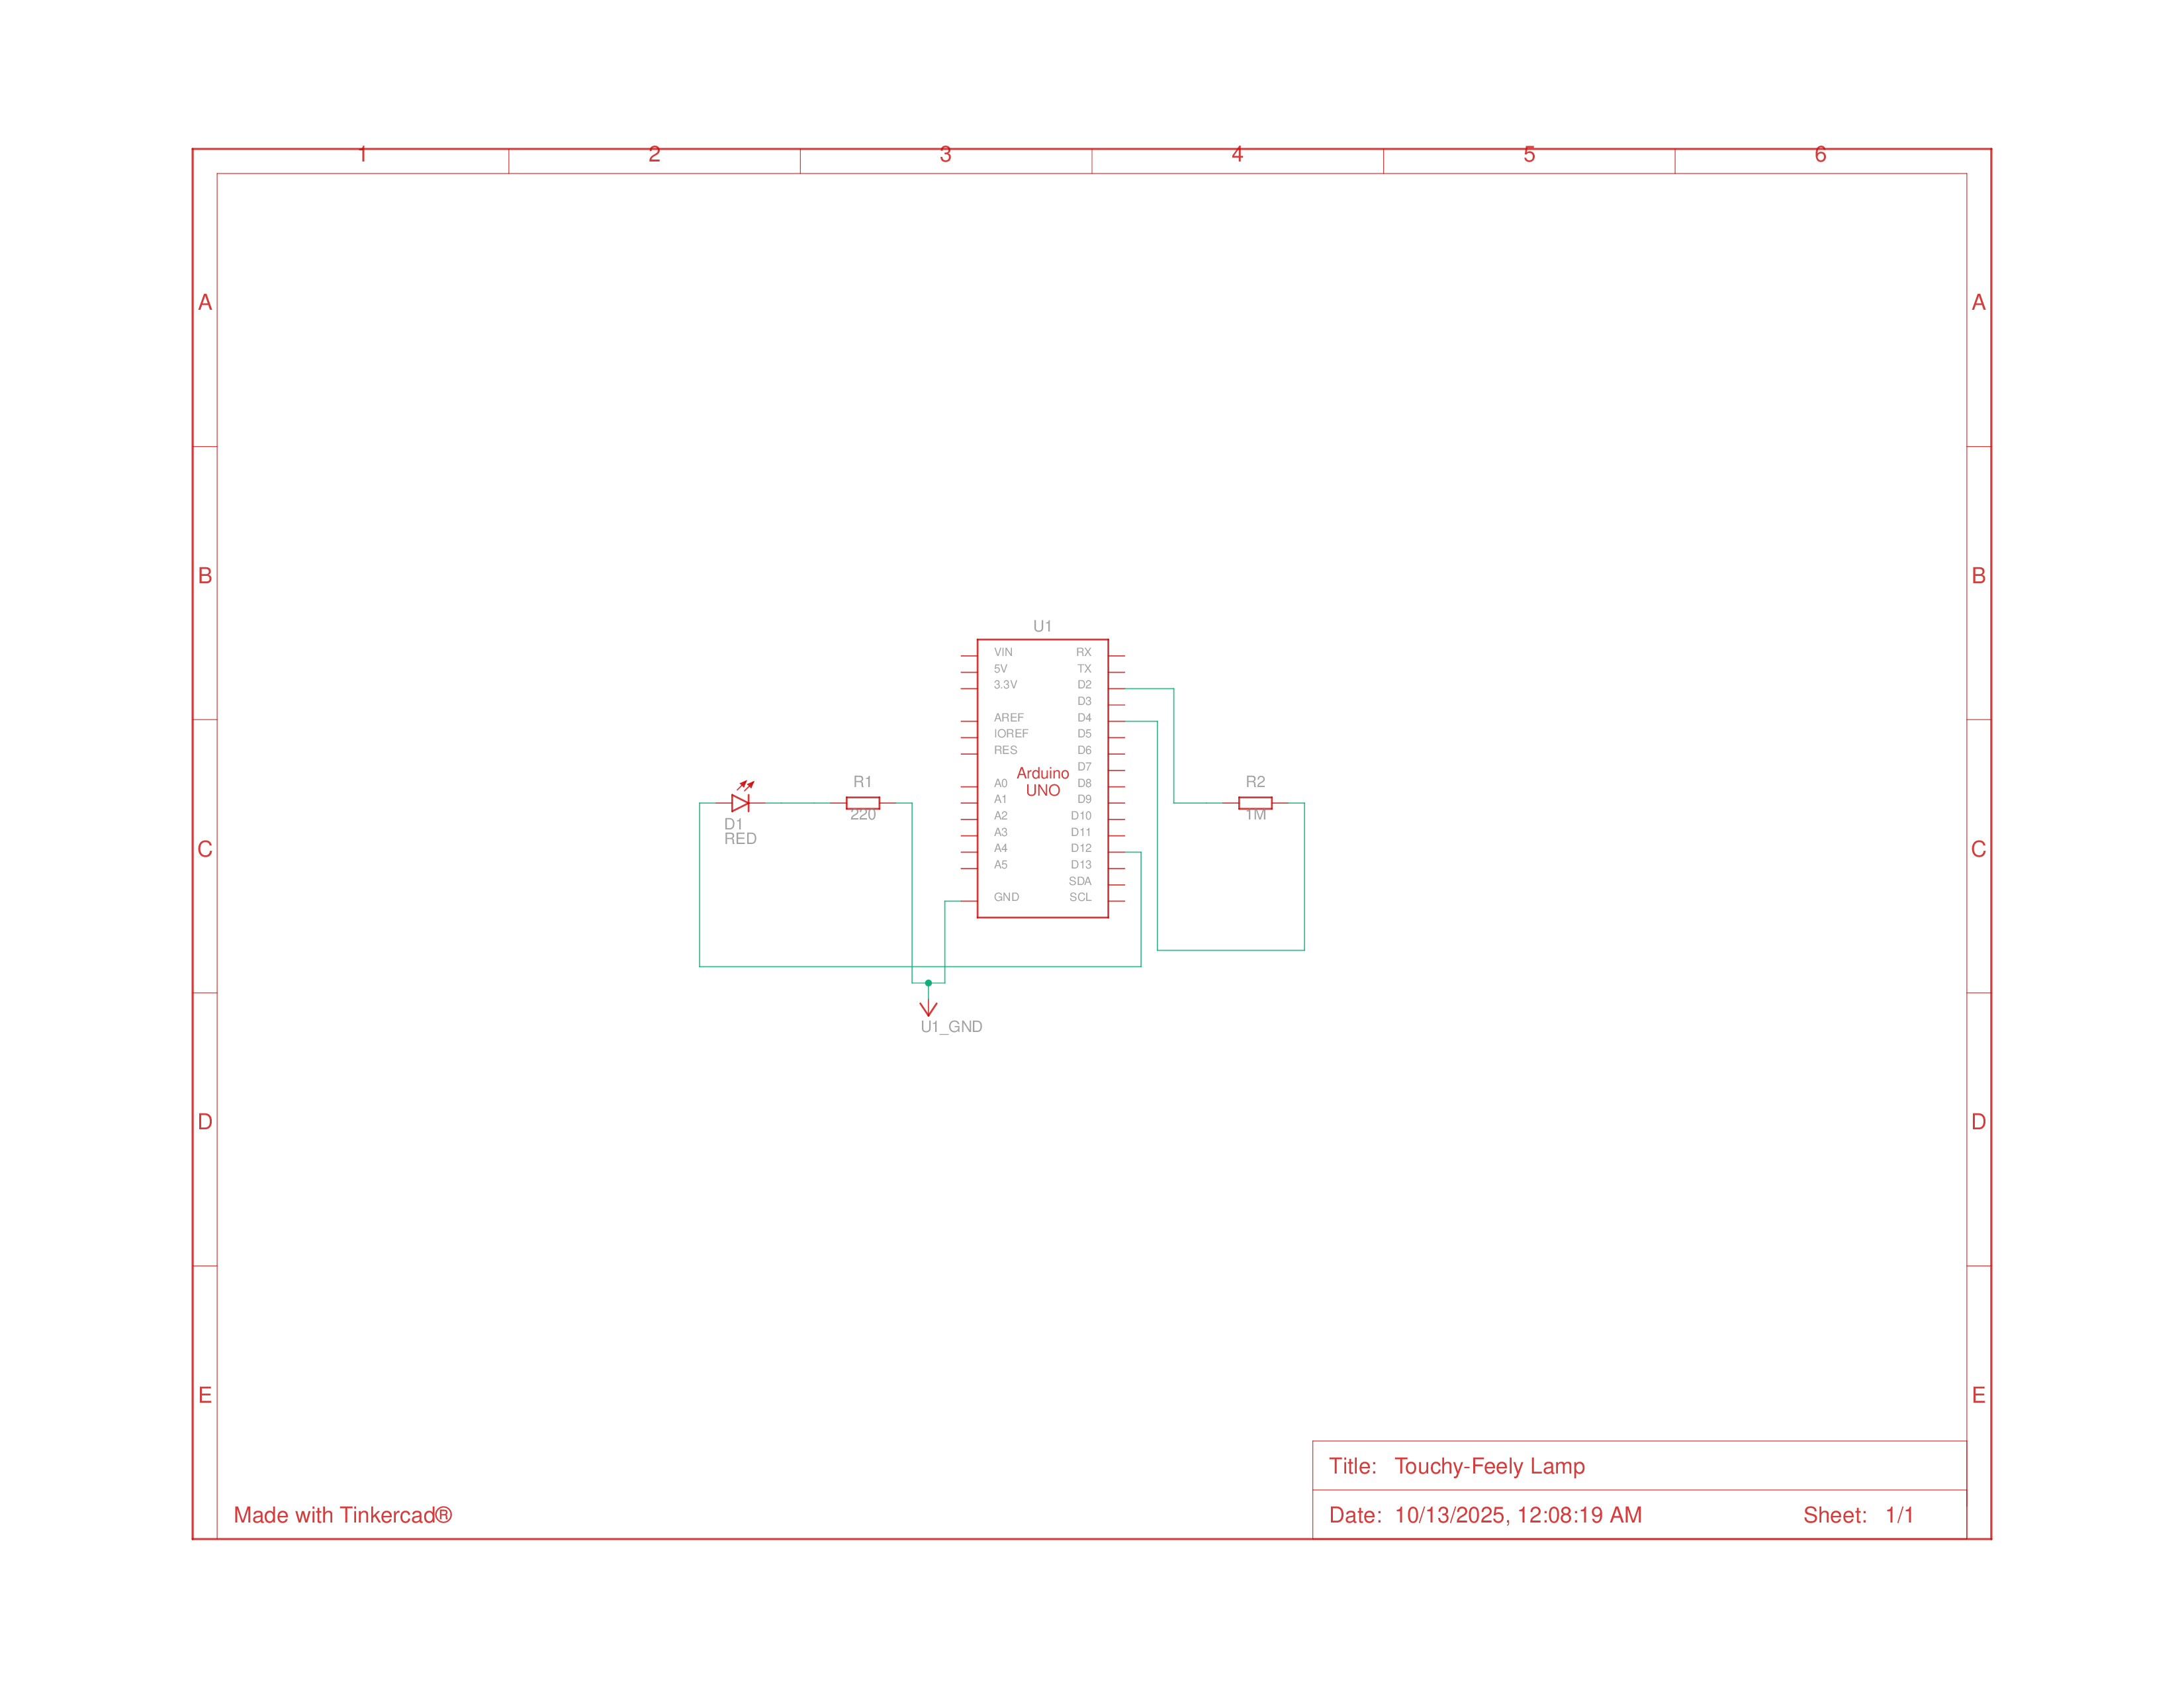
| Name | Quantity | Component |
|---|---|---|
| U1 | 1 | Arduino Uno R3 |
| R1 | 1 | 220 Ω Resistor |
| D1 | 1 | Red LED |
| R2 | 1 | 1 MΩ Resistor |
Schematics
Building the Circuit
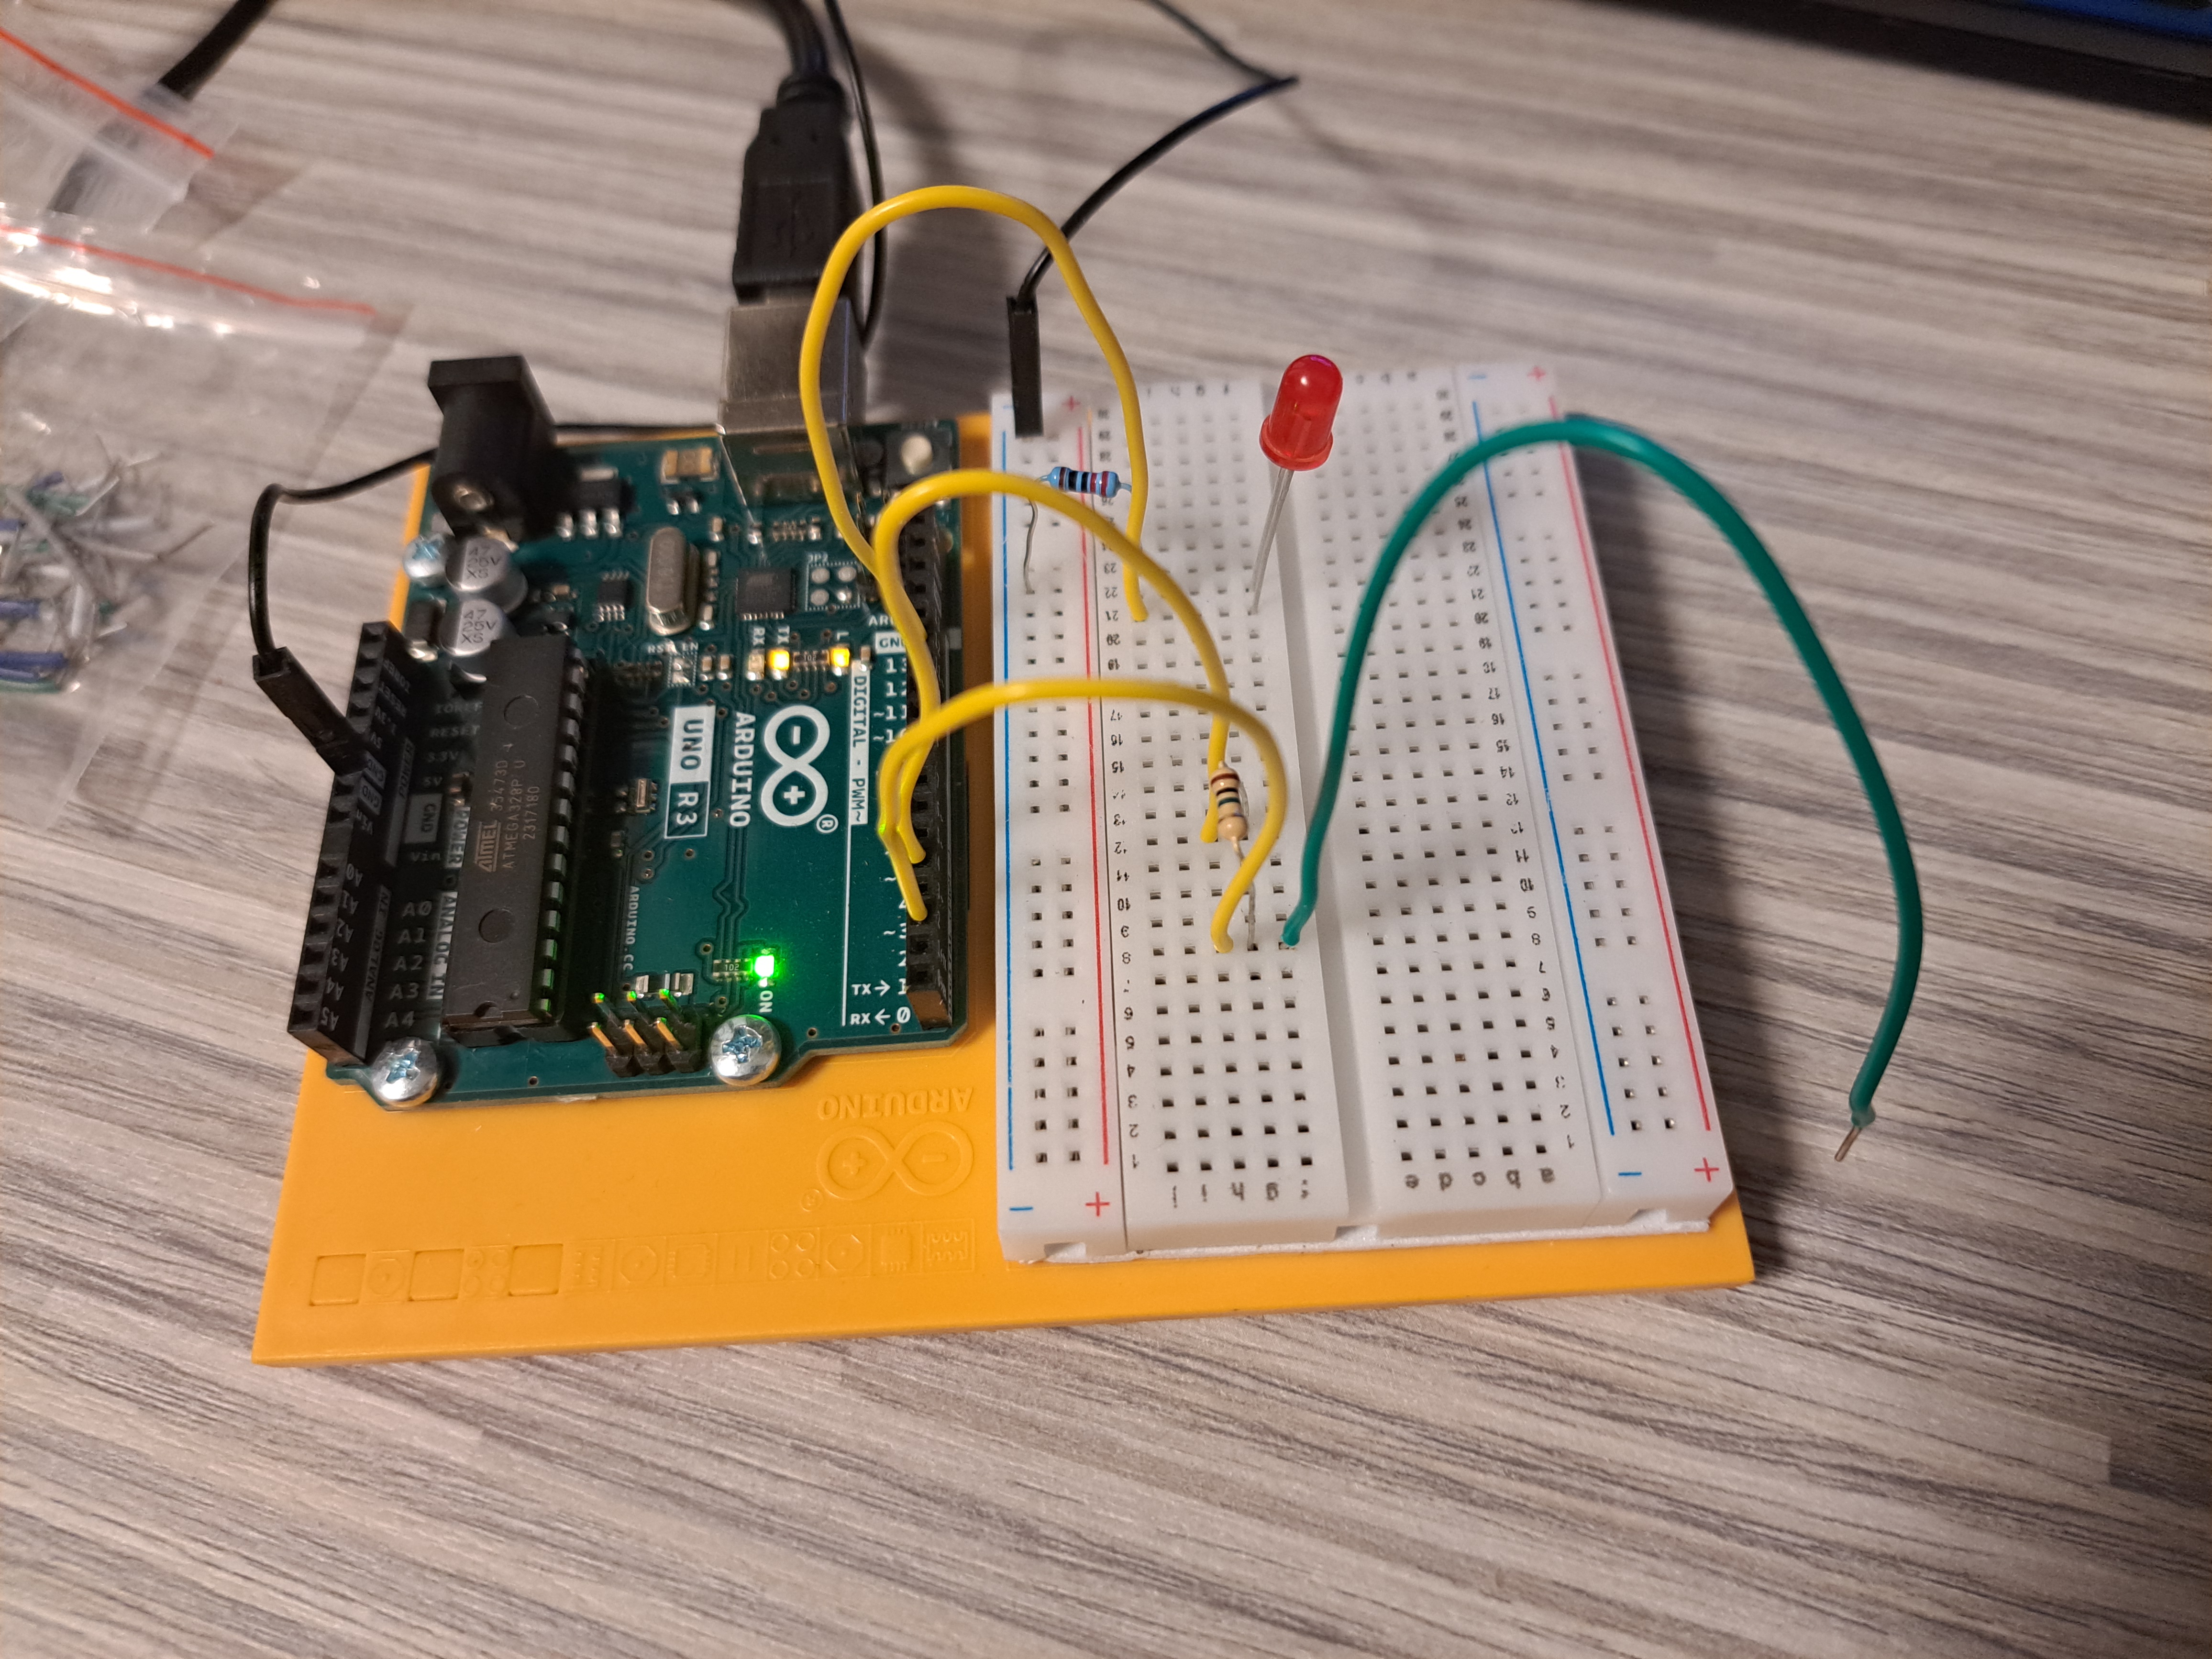
This circuit was refreshingly simple to put together and didn’t take long to do. The only thing that I had to go out of my way to do was download the capacitive sensor library, which was easy enough to do in the Arduino IDE.
Programming
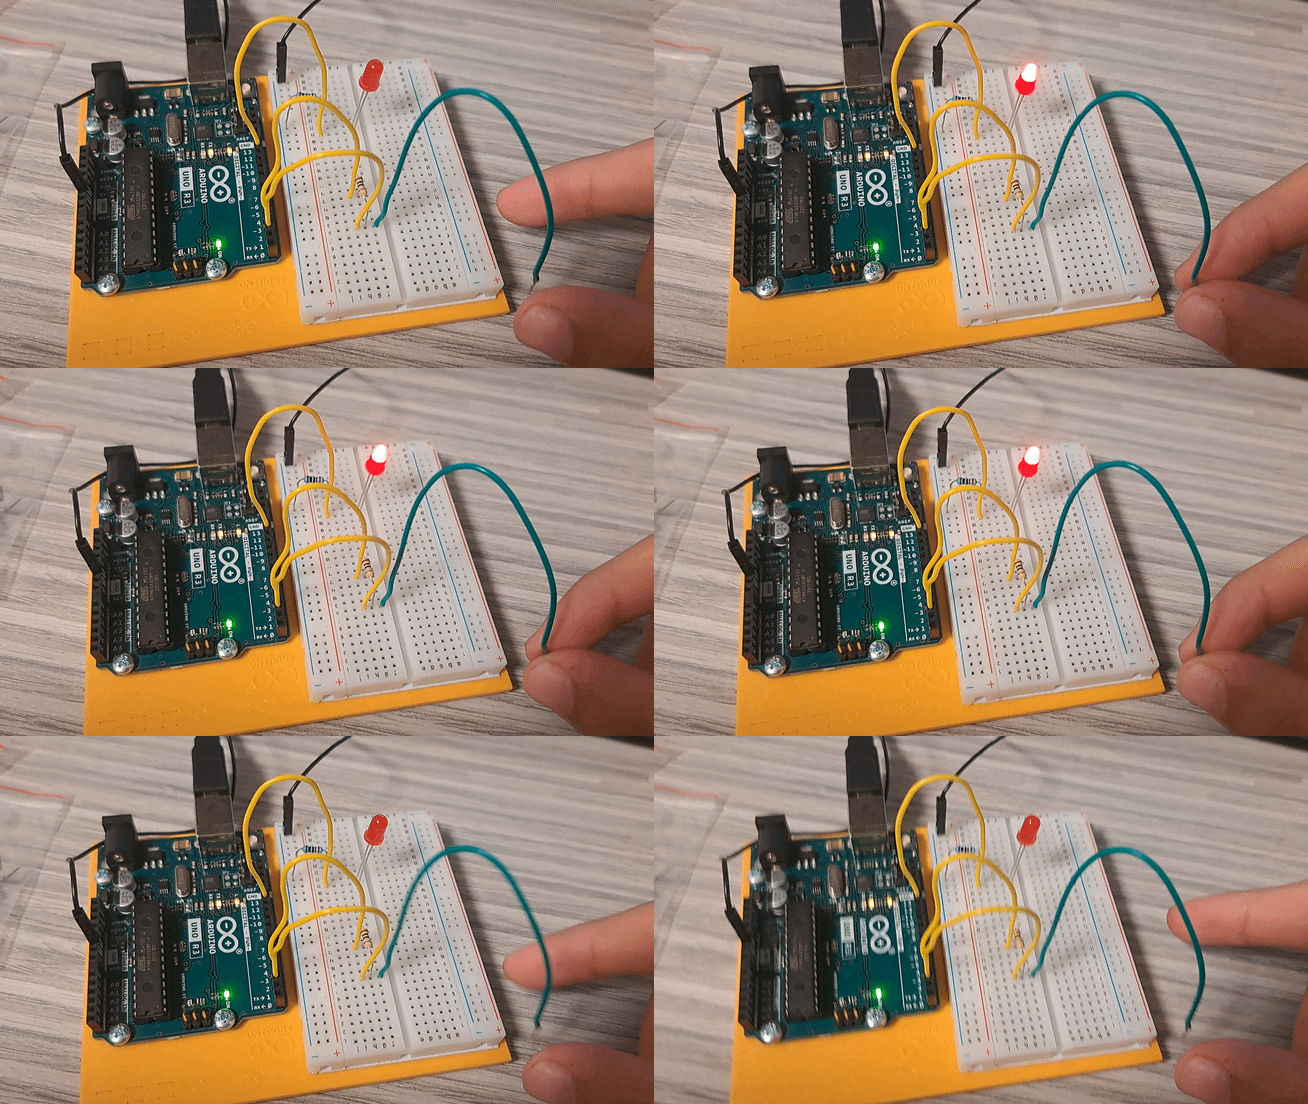
After confirming that the circuit was working, I then unloaded the example sketch and began programming the arduino.
1
2
3
4
5
6
7
8
9
10
11
12
13
14
15
16
17
18
19
20
21
22
23
24
25
26
#include <CapacitiveSensor.h>

// create an instance of the library
// pin 4 sends electrical energy
// pin 2 senses senses a change
CapacitiveSensor capSensor = CapacitiveSensor(4, 2);
const int ledPin = 12;

// threshold for turning the lamp on
int threshold = 1000;

void setup() {
  Serial.begin(9600);
  pinMode(ledPin, OUTPUT);
}

void loop() {
  long sensorValue = capSensor.capacitiveSensor(30);
  Serial.println(sensorValue);

  // if the value is greater than the threshold
  if (sensorValue > threshold) digitalWrite(ledPin, HIGH);
  else digitalWrite(ledPin, LOW);

  delay(10);
}
This post is licensed under CC BY 4.0 by the author.