Homework 14: Tweak the Logo
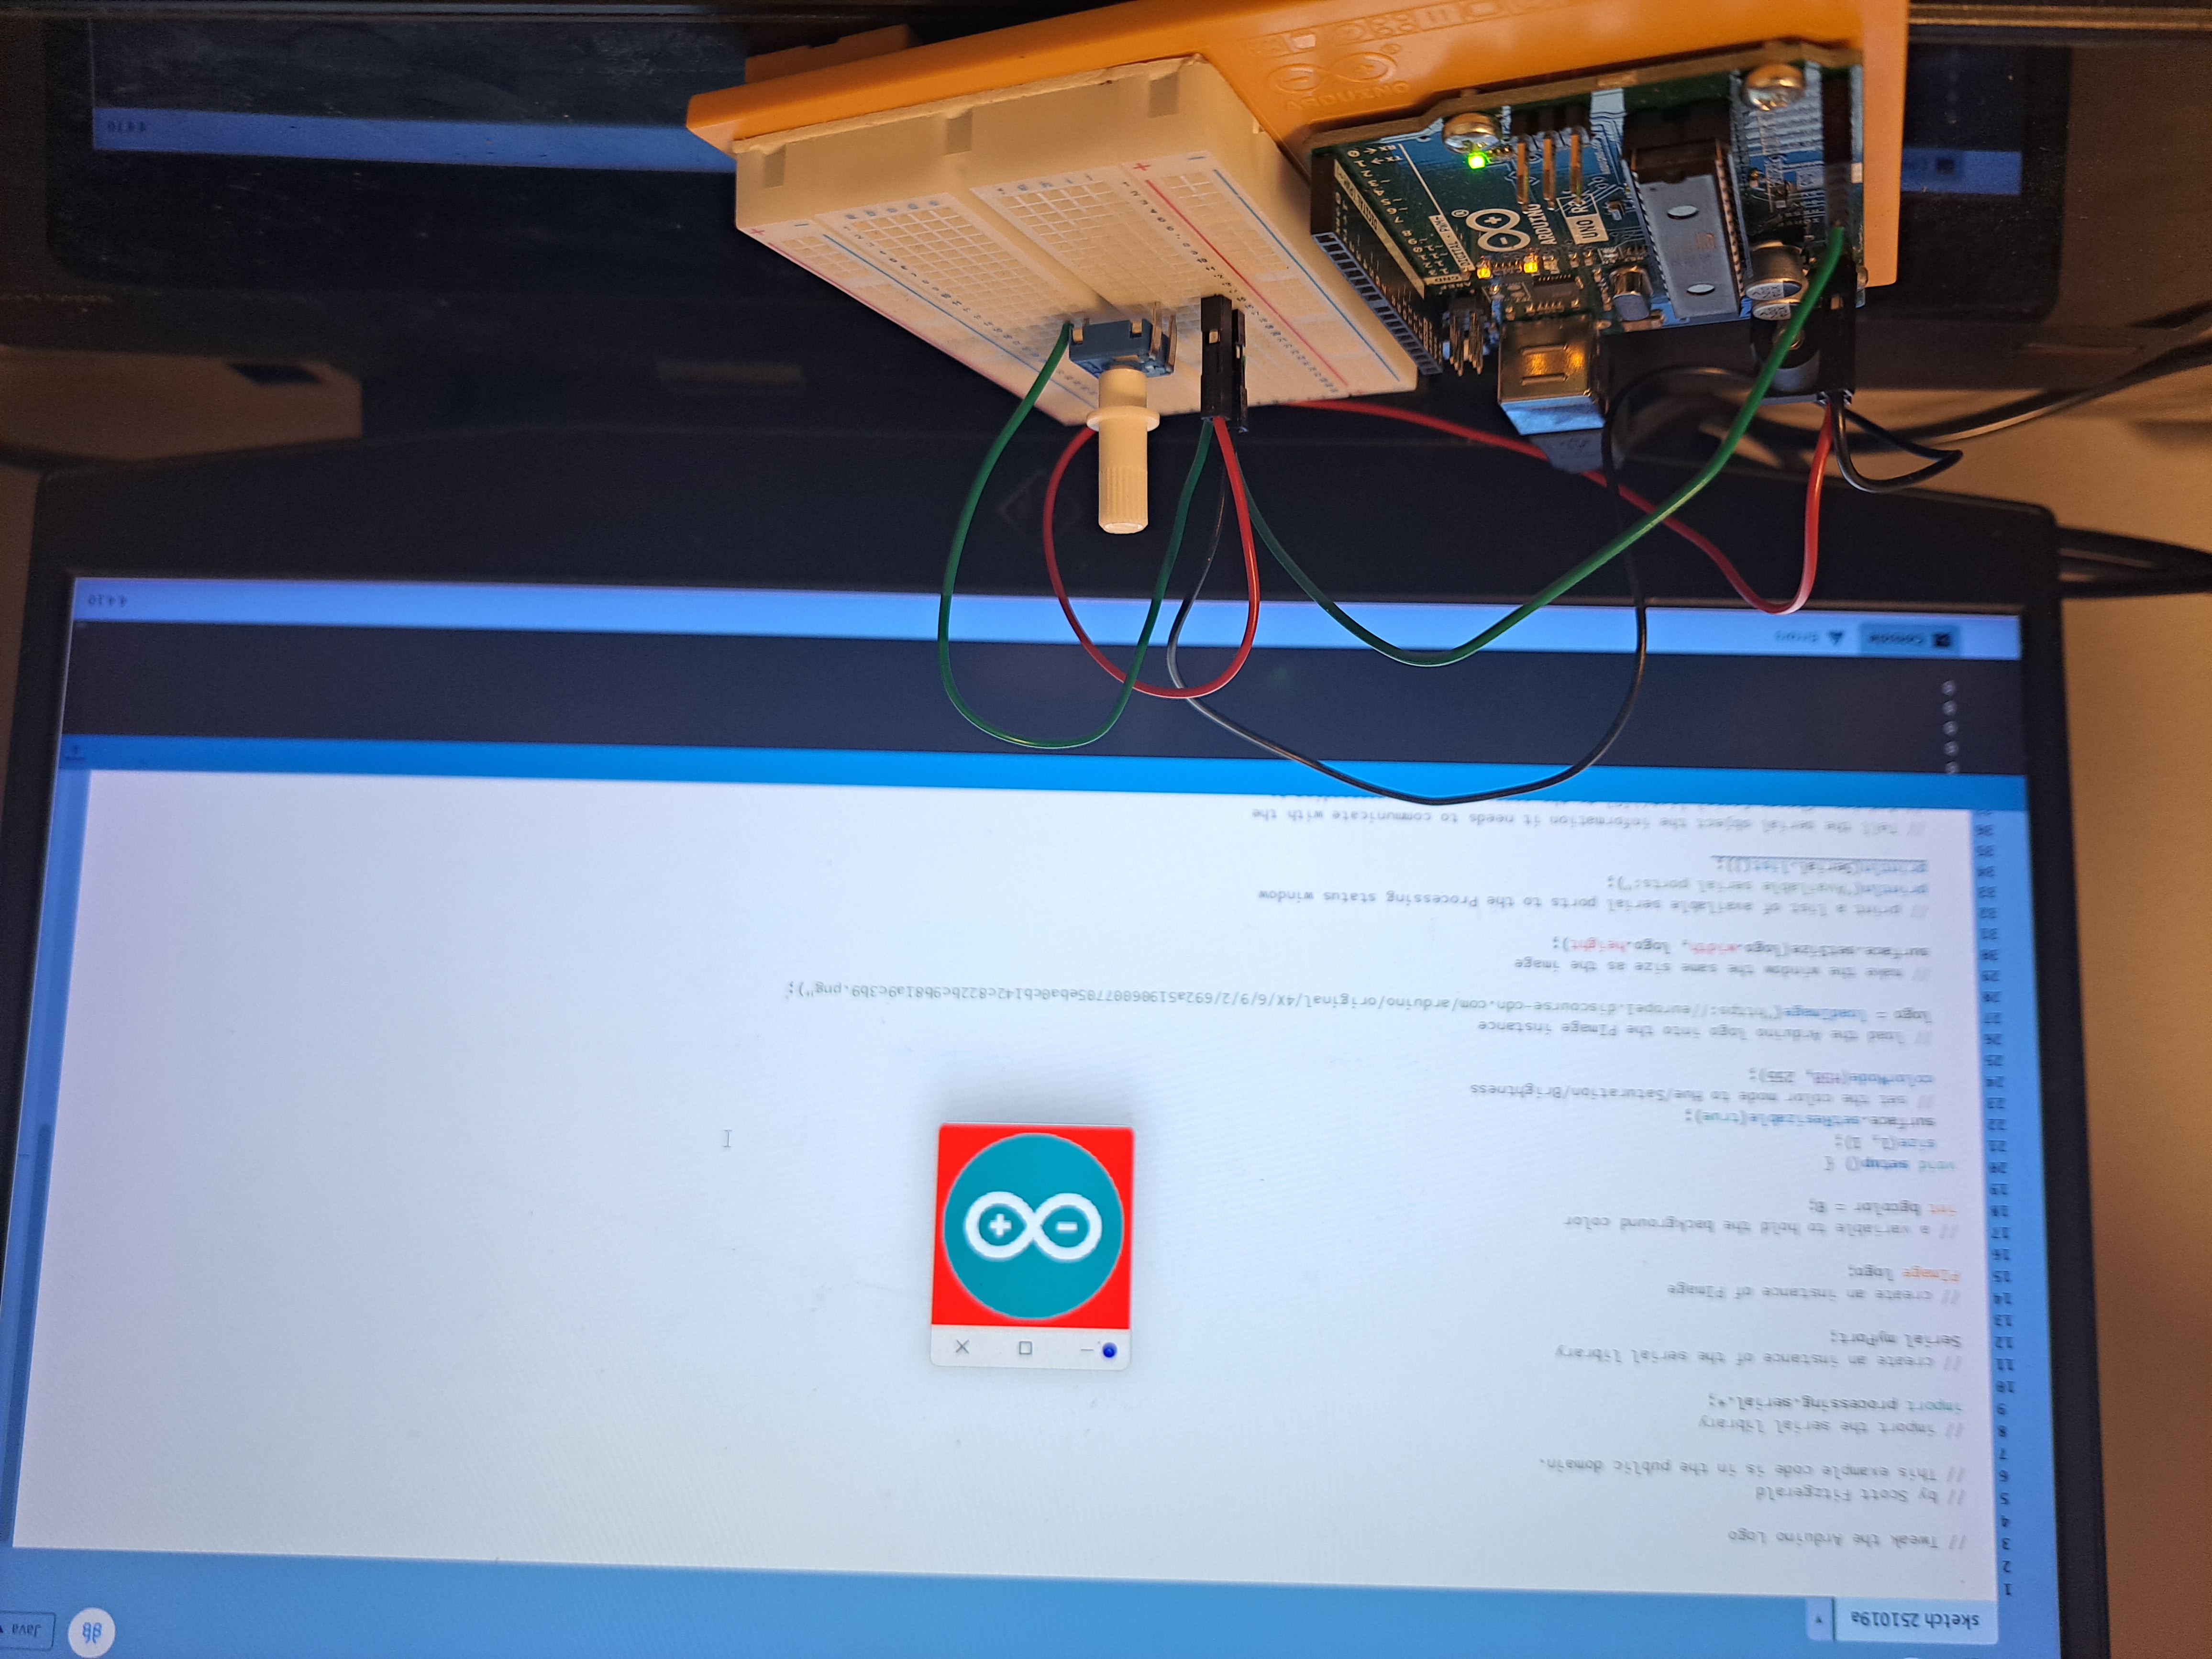
The Circuit
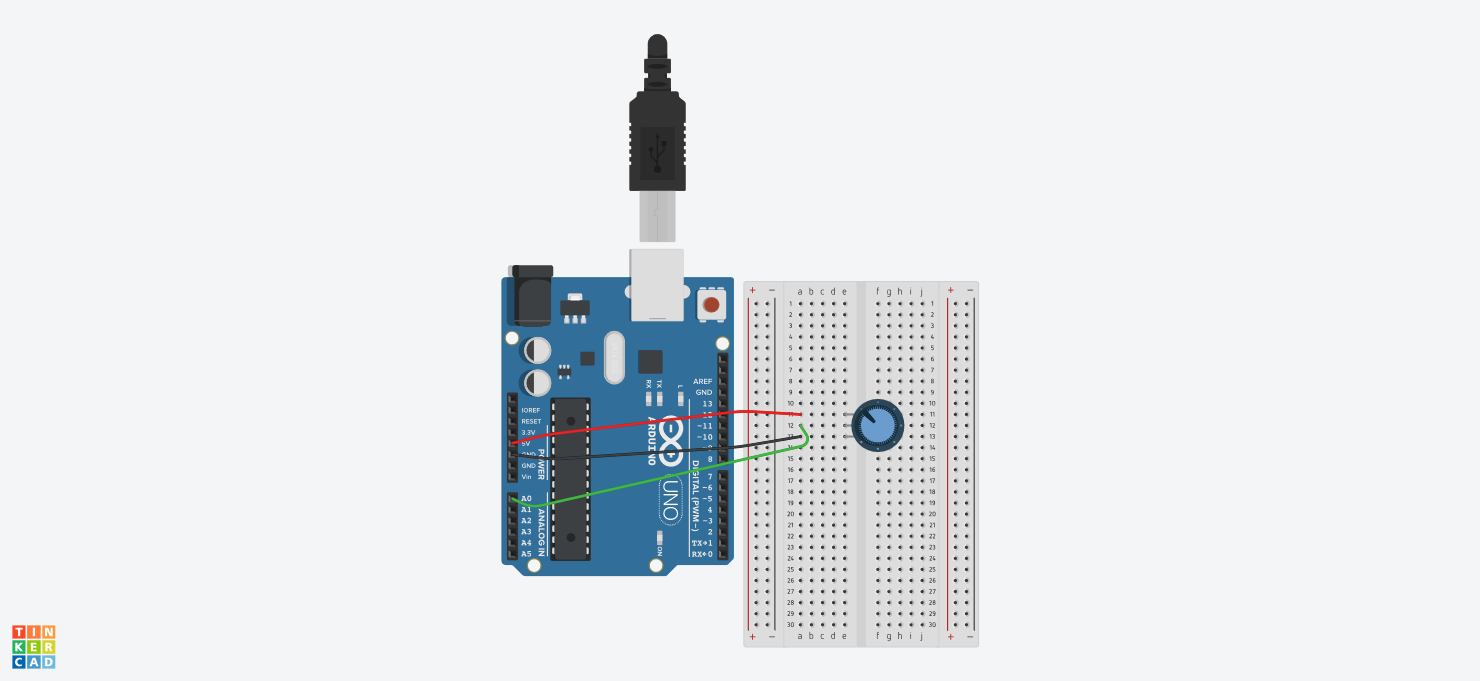
Parts List
| Name | Quantity | Component |
|---|---|---|
| U1 | 1 | Arduino Uno R3 |
| Rpot1 | 1 | 250 kΩ Potentiometer |
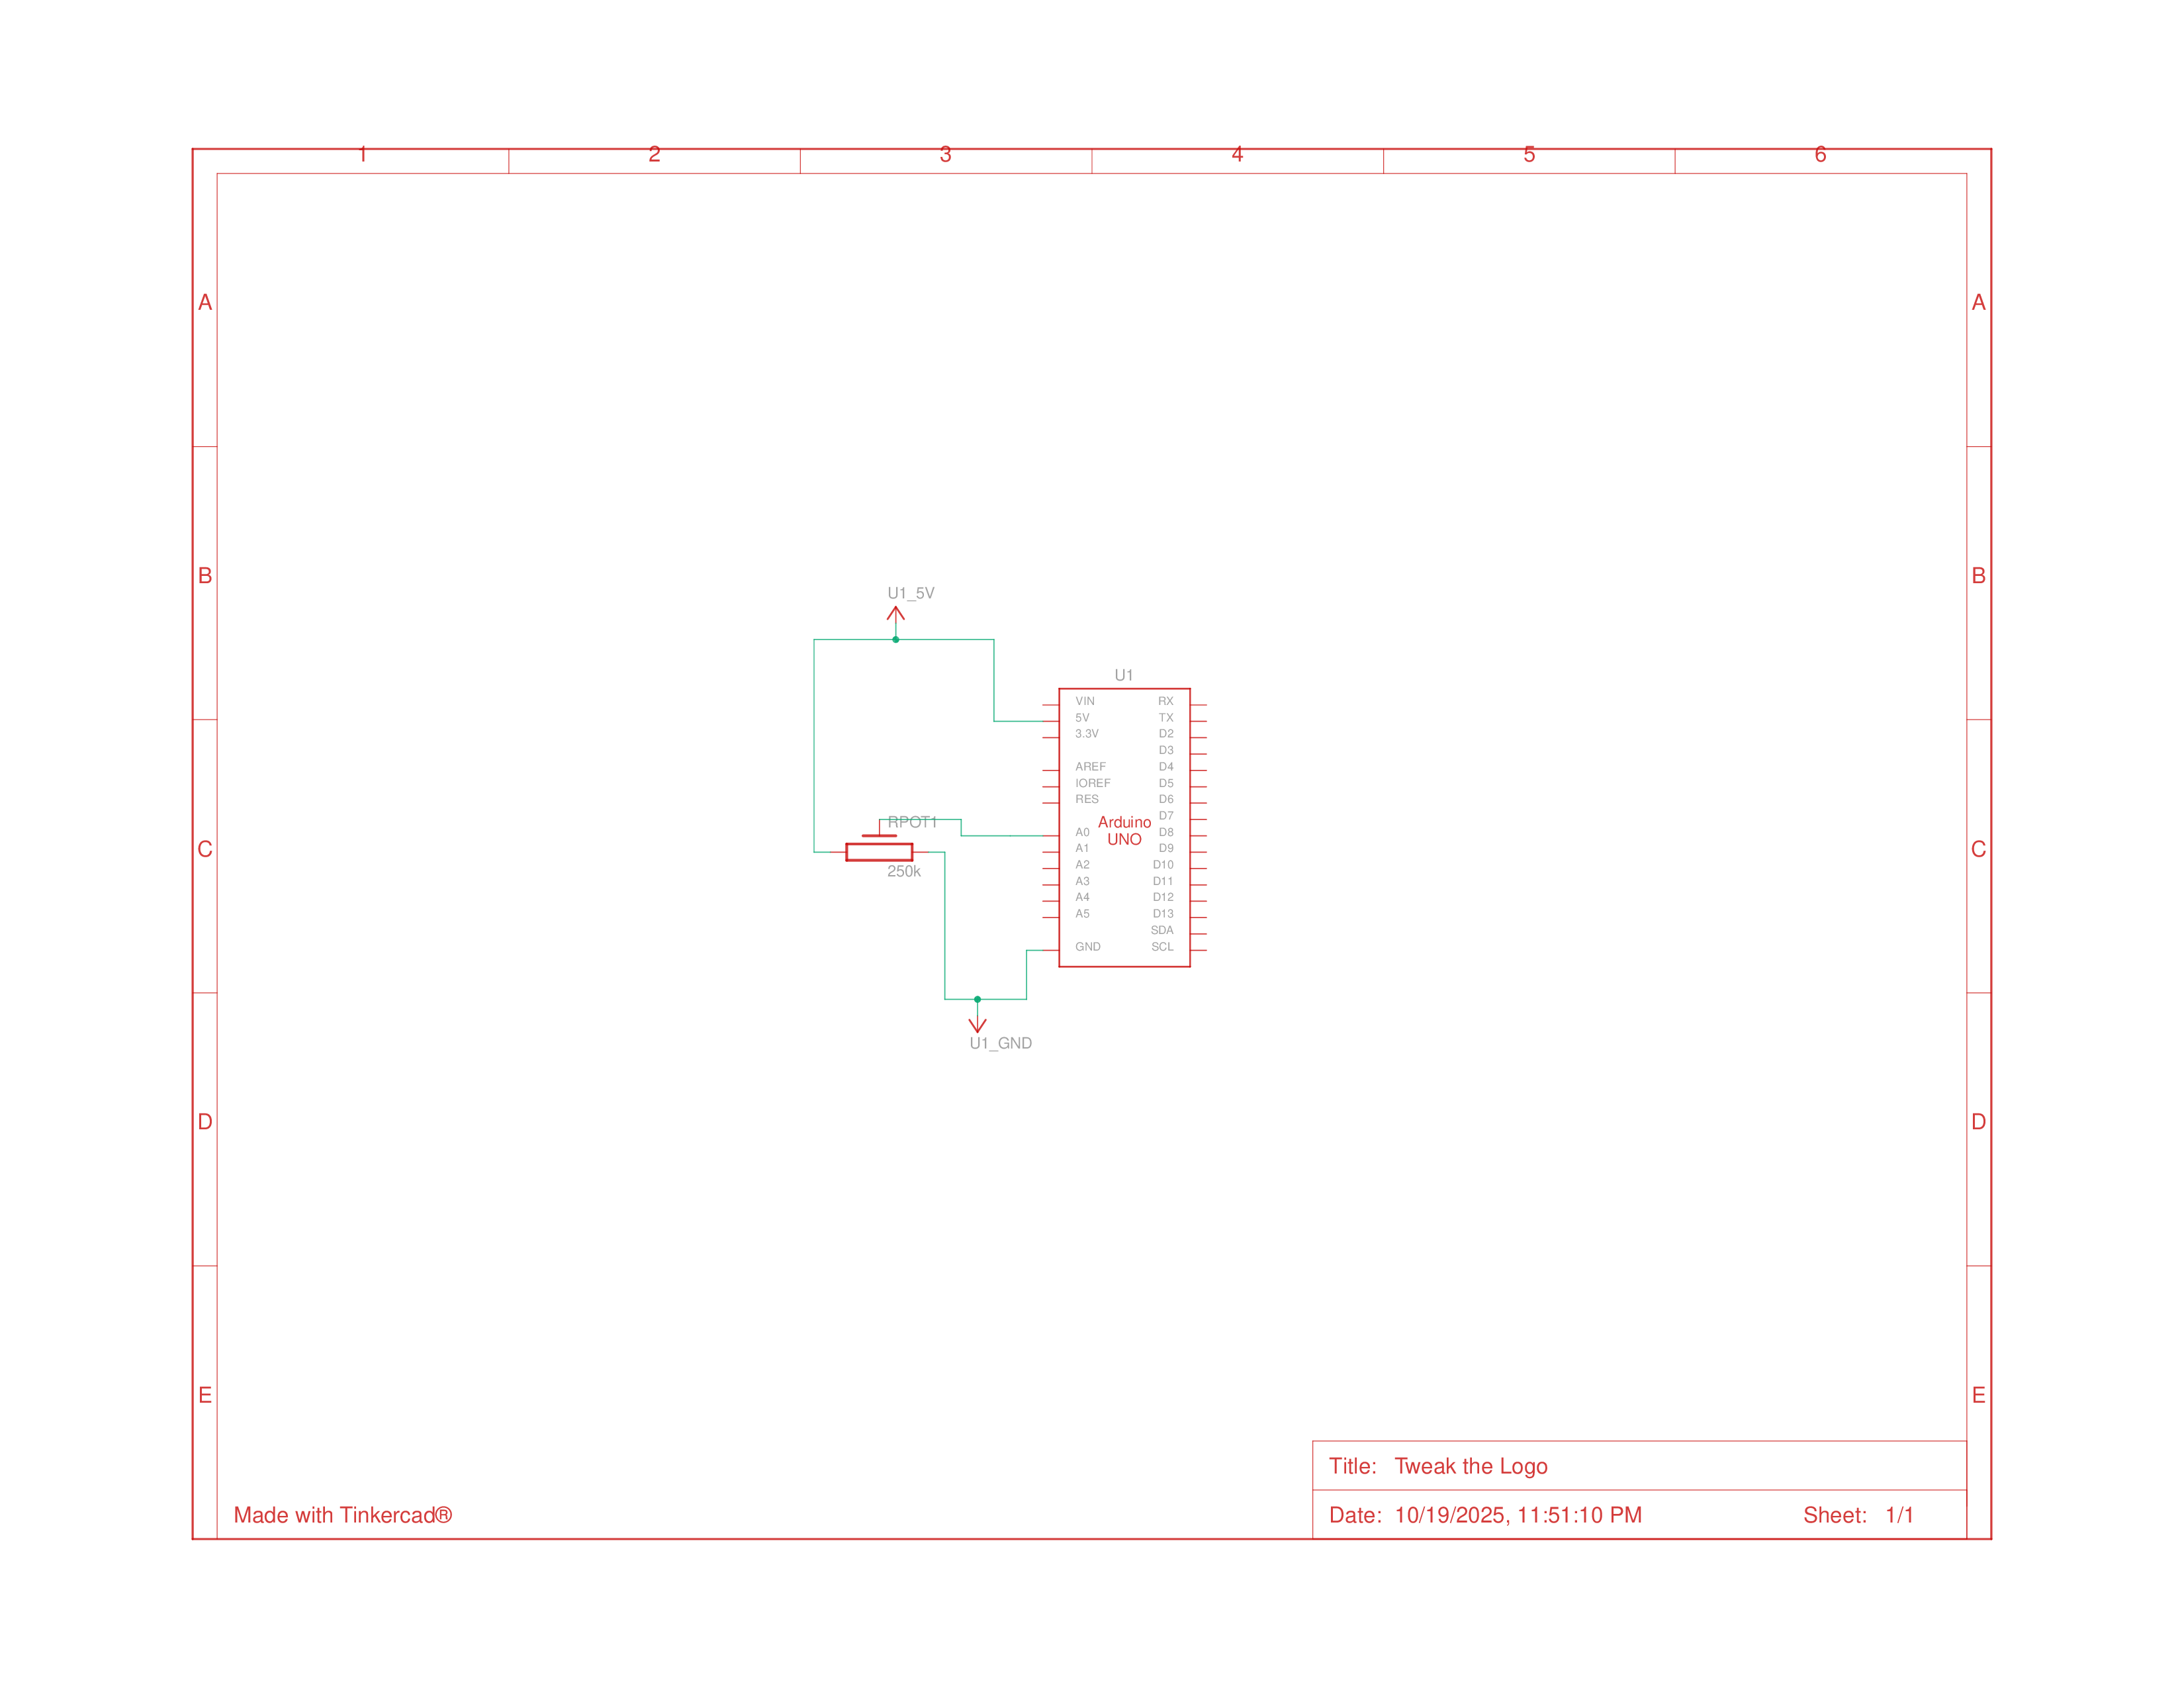
Schematics
Building the Circuit
This circuit was very simple with just one component to wire up. I connected the potentiometer and wen straight to programming. It was interesting to start working with processing to control things on my laptop. I got the IDE setup and began programming.
Programming
When programming, I ran into 2 main issues:
- The image link didn’t work, which caused the program to crash, and I fixed by just finding another link to the image online, though it took me a little bit to figure out that that was the problem, until I noticed the error 403 in the debug log.
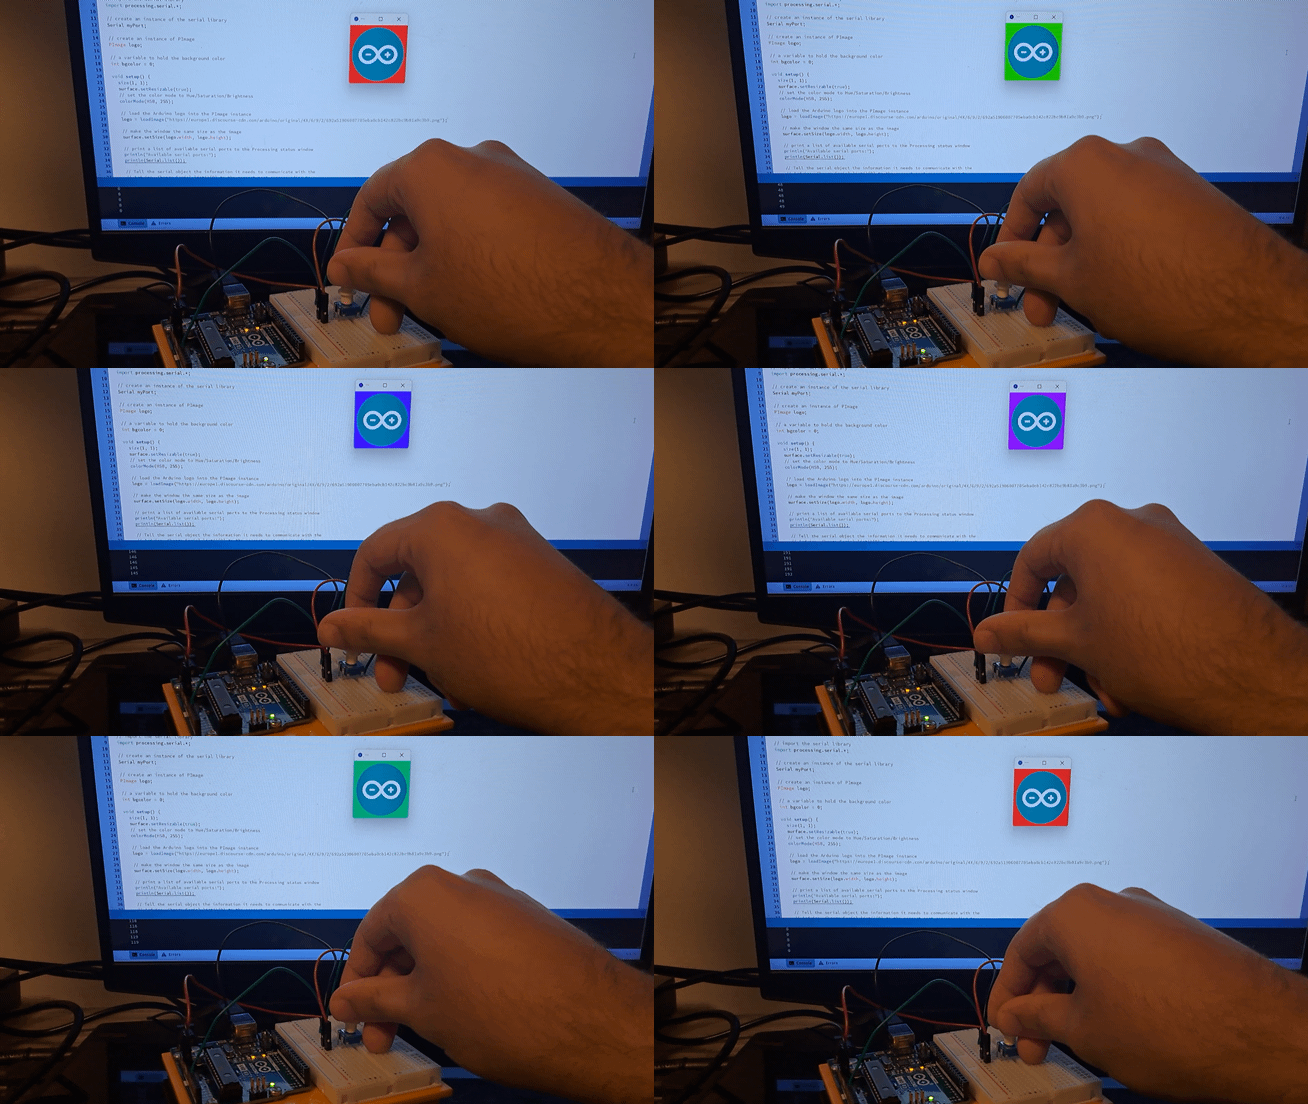
- The bit buffer was being constantly overrun in the if statement, which meant that the program was unable to read and respond to the potentiometer. I could have fixed this by just increasing the delay when reading values, which solved the problem, but it still felt a little laggy and jittery, so I opted to turn the if statement to a while loop with the same 1 ms delay which felt much smoother and more responsive.
Code
Arduino Code
1
2
3
4
5
6
7
8
9
10
11
void setup() {
  // initialize serial communication
  Serial.begin(9600);
}

void loop() {
  // read the value of A0, divide by 4 and send it as a byte over the
  // serial connection
  Serial.write(analogRead(A0) / 4);
  delay(1);
}
Processing Code
1
2
3
4
5
6
7
8
9
10
11
12
13
14
15
16
17
18
19
20
21
22
23
24
25
26
27
28
29
30
31
32
33
34
35
36
37
38
39
40
// import the serial library
import processing.serial.*;

// create an instance of the serial library
Serial myPort;
PImage logo;
int bgcolor = 0;

void setup() {
  size(1, 1);
  surface.setResizable(true);
  // set the color mode to Hue/Saturation/Brightness
  colorMode(HSB, 255);

  // load the Arduino logo into the PImage instance
  // (I lost the link I used since I forgot to save the file)
  logo = loadImage("INSERT_IMAGE_LINK");

  // make the window the same size as the image
  surface.setSize(logo.width, logo.height);

  // give serial object the information it needs to communicate
  myPort = new Serial(this, "COM3", 9600);
}

void draw() {
  // while there is information in the serial port
  while ( myPort.available() > 0) {
    // read the value and store it in a variable
    bgcolor = myPort.read();

    println(bgcolor);
  }

  // Draw the background using value from Serial Port
  background(bgcolor, 255, 255);

  // draw the Arduino logo
  image(logo, 0, 0);
}
This post is licensed under CC BY 4.0 by the author.